
Using these simple steps, students (and teachers!) can easily find and add images and videos to their Google Slides WITHOUT EVEN LEAVING THE PAGE!
Getting Ready
- Open a Google Slide.
- Pull down the Tools menu to Research.
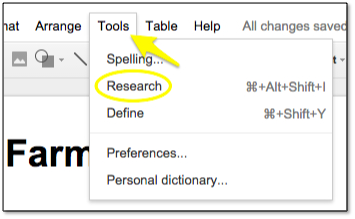
- This will open a research window at the right side of the page.
Finding & Adding Images or Videos
- In the research window at the right, click the triangle in the search bar and pull down to “Images” or “Videos.”
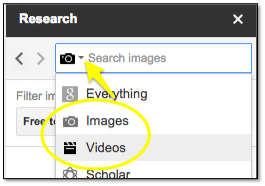
- Enter search keyword(s).
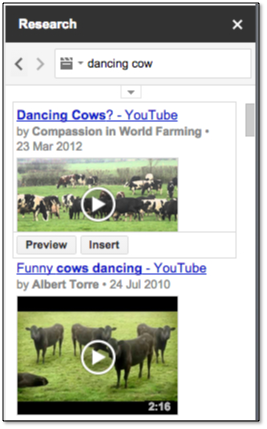
- Select the desired image or video and click the “Insert” button – or just grab the desired image or video and drag it onto the slide!
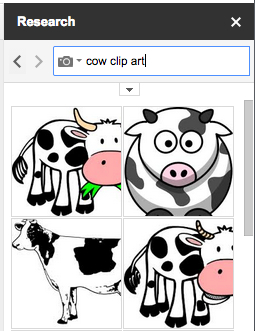
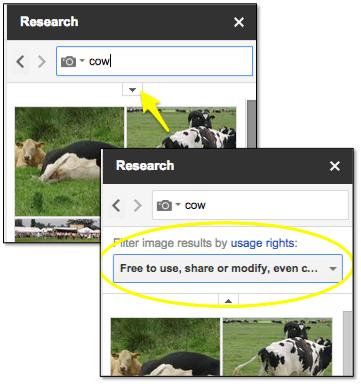
Options
- Want clip art instead of photos? Just add the words “clip art” within the search window.
- For copyright friendly images, click the triangle under the search window for options.
- To play a video on the slide:
– In the Edit mode, double-click the video.
– In the Present mode, click the play button.

Wondering if anyone has a work-around for getting non-YouTube videos in Google Slides?
Love your tips!
As a curiosity, do you know if the Google Images pulling in are the ones labelled for reuse? We try really hard to teach our students to be as diligent as possible when it comes to copyright. I was just curious.
Thanks again for the awesome tips!
Hi Kristy,
Look under the “Options” section and you’ll see how to filter the images to find only the ones labeled for reuse. Pretty cool, huh?
– Tammy